
Use Azure AD to Authorize Access to Azure Blob Storage
This post is part of the 2021 C# Advent Calendar. Please check out the other great posts as well!
In this post, I explain how to enable authorization to Azure Blob Storage using IAM on a storage account. At the end of this post, you will understand how to leverage Azure Active Directory App Registrations, Identity Access Management, RBAC, and the C# Azure identity and storage APIs to securely access Azure blob storage containers and data.
The application is a .NET 5 console application written in C# using Visual Studio 2019. An Azure subscription is also required with permissions to modify storage accounts and active directory. While it hasn't cost any money for the Azure demos I've created so far, regular Azure usage rates apply. The full application is available on GitHub.
This application contains 3 options: create a blob container, upload a file to a blob container, and download a file from a blob container. These are secured using IAM and RBAC. The steps to achieve this are: create a new app registration in Azure AD to act as the service principal, create and configure a storage account for blob storage, configure the RBAC of the storage account for the service principal, and configure the application to use the app registration and storage account. The first step is to create the app registration and we'll do that in the next section.
Create Azure AD App Registration to act as the Service Principal
Log into the azure portal and navigate to Azure Active Directory. Click on App registrations from the menu on the left side.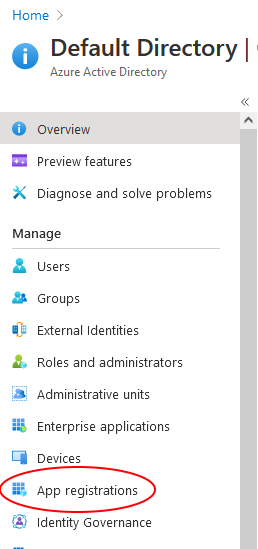
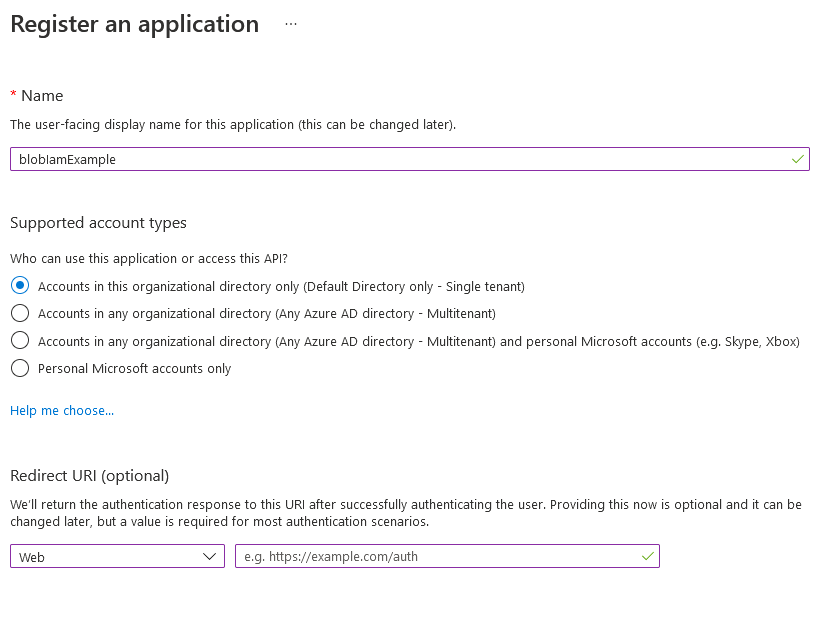
Click New registration at the top of the page. Enter a name for the app registration, leave
Accounts in this organizational directory only (Default Directory only - Single tenant) selected for the second option and you can leave the redirect URI blank. Once the information filled out, click Register at the bottom of the page.
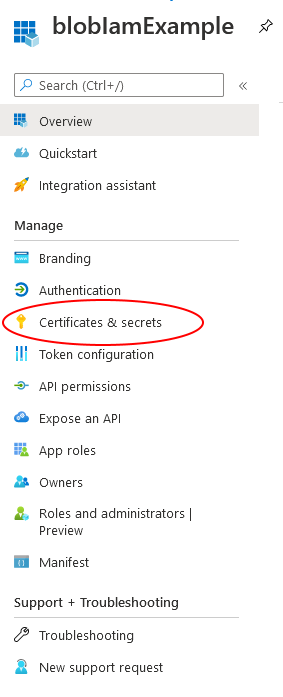
This takes you to the app registration overview page. The next step is to add a client secret that our application will use to connect to blob storage using this app. Click on Certificates & secrets from the left-hand navigation menu.
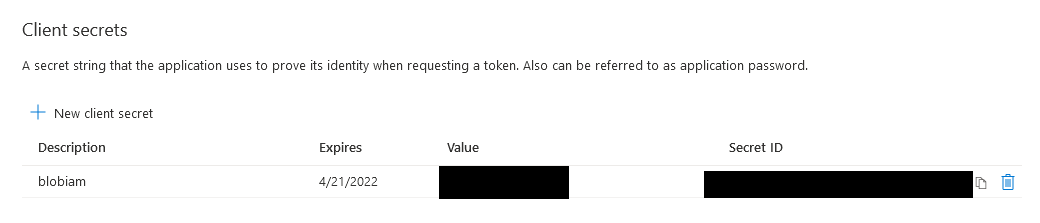
Click Add new client secret under the Client secrets section. Enter a description and when the secret should expire. Then click Add.
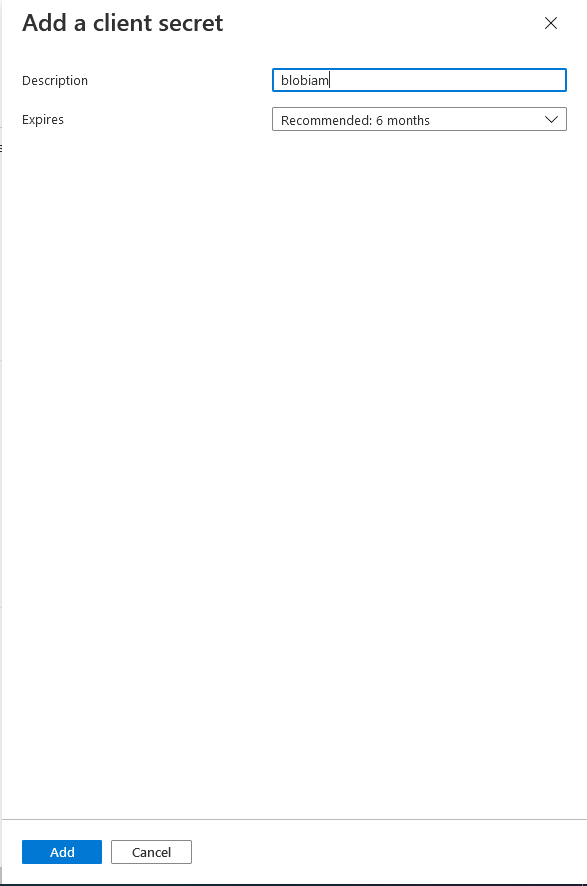
After the secret is created, you are returned to the Certificates & Secrets page with a new entry in the Client secrets section. Be sure to copy the client secret value because we'll need it later to configure the application. This is the only time the secret is available to copy. If it's not saved now, you will have to create a new secret when we get to the section on configuring the application.
Create the Storage Account
The next step is to create the storage account. As with other Azure resources, there are a number of ways to do this including the Azure portal and powershell, along with a number of options for data protection and networking. Follow this guide from the Microsoft documentation to create a storage account. Return to this post when it's deployed and we'll setup the RBAC permissions for the service principal in the storage account in the next section.Assign RBAC to Service Principal
The third step is to assign the correct permissions to the service principal we created in step 1 to the storage account. Two permissions are required,reader and Storage Blob Data Contributor. In order for the service principal to access the storage account resource, it needs the Microsoft.Storage/storageAccounts/listkeys/action which is available in a number of built-in Azure roles. The role with the least permission is the reader role. That's why we need to apply the reader role as well as the Storage Blob Data Contributor role. For more information, see this Microsoft doc.
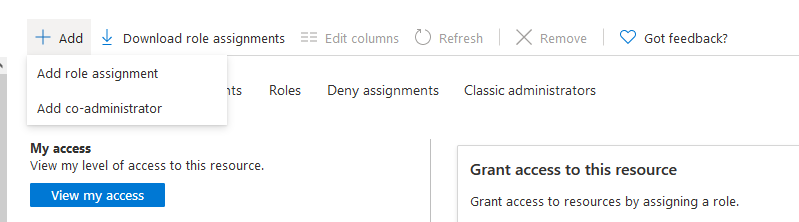
To assign the reader role, from the storage account Overview page, click on Access Control (IAM) from the menu on the left side.

Next, click Add > Add role assignment from the top navigation bar.
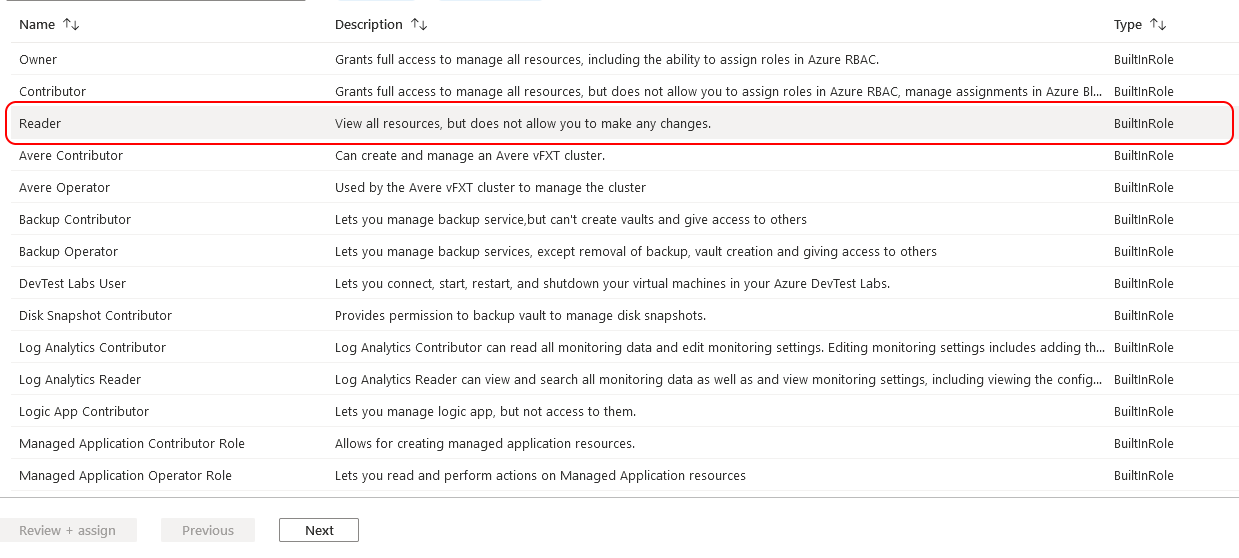
The following description and screenshots will add the
reader role. The same process will be followed to add the Storage Blob Data Contributor. First select the reader role from the list of built-in roles. Click Next to advance to the members tab.
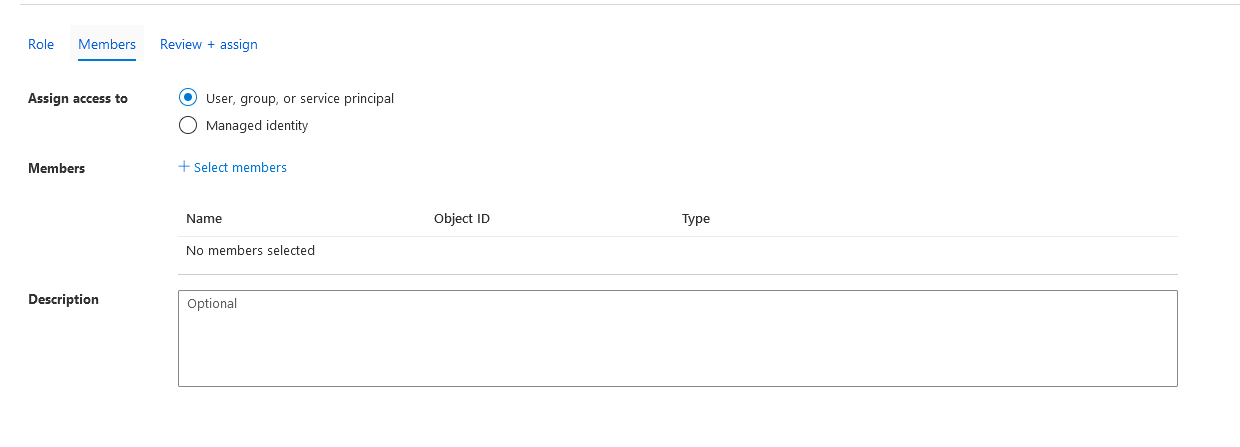
On the Members tab, ensure the
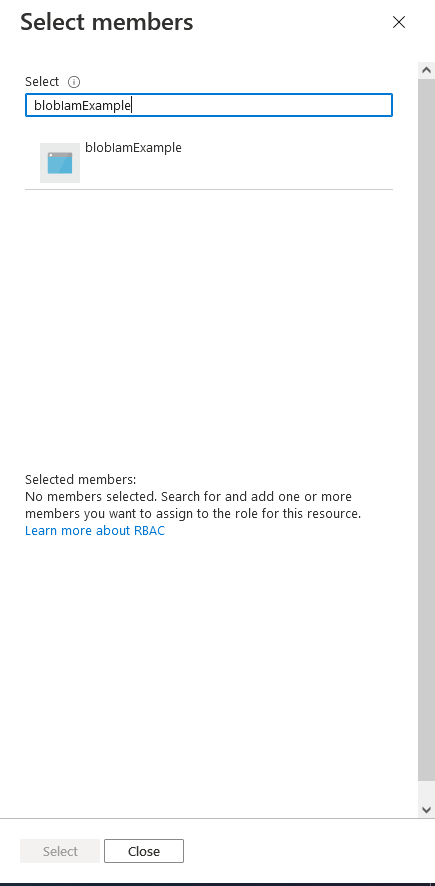
User, group, or service principal radio box is checked (it should be the default). Next to the Members label, click + Select members. A blade opens on the right side with users listed by default. Search for the name of the AD app registration that was created in step 1. In my case that is blobIamExample. Click on the application and then click select.
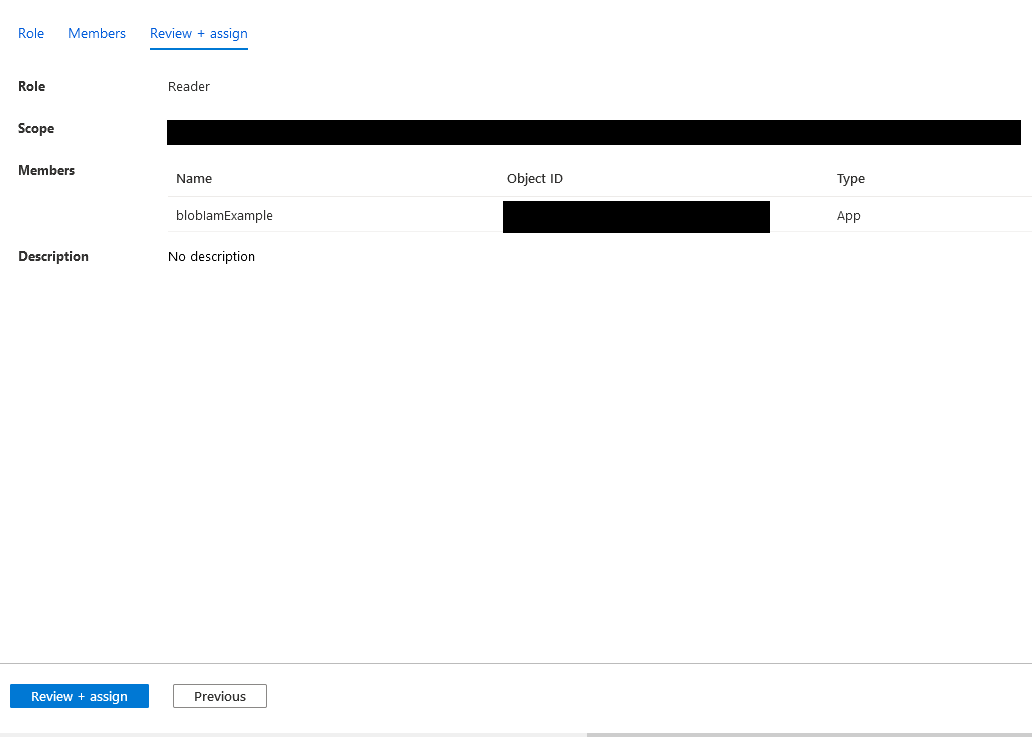
Click Review + assign. The review screen allows you to see which user is being assigned which role and for what scope. Click on Review + assign at the bottom of the page. It will redirect back to the Access Control (IAM) landing page and a task will start to add the role.
The same process will be followed to add the
Storage Blob Data Contributor role. An important note about assigning IAM roles is it can be done at different levels. You could assign the Storage Blob Data Contributor role at the blob container level as well if you only want the app service principal to have contributor permissions to a specific blob container. In this case, we gave the permissions for the entire storage account. Once both roles are added, we can configure the application to use our storage account and service principal to interact with blob storage. We'll do that in the next section.
Configure Application
The fourth step is to clone the sample application from GitHub and update the configuration values to work with your Azure AD app and storage account. Start by cloning the repository from GitHub. Update theConfigConstants.cs file and change the StorageUrl, TenantId, ClientId, and ClientSecret fields to match your values from Azure. If you didn't save the ClientSecret from earlier you will have to create a new one from the Azure AD app registration as there is no way to find the value after it's been created. That's all you need to the run the application. Start the app from Visual Studio to try it out! In the next sections, I'll dig into each function and explain the code.
Authenticating the BlobServiceClient
TheBlobServiceClient class is part of the Azure storage .NET API and is used to access and manipulate Azure storage accounts and containers. One of the constructor overloads takes an instance of a TokenCredential implementation. The TokenCredential class is abstract, provides an OAuth token, and offers a number of implementations to handle different authentication scenarios. In this case, we use the Azure.Identity.ClientSecretCredential implementation.
ClientSecretCredential cred = new ClientSecretCredential(ConfigConstants.TenantId, ConfigConstants.ClientId, ConfigConstants.ClientSecret);
BlobServiceClient blobServiceClient = new BlobServiceClient(new Uri(ConfigConstants.StorageUrl), cred);
Azure.Identity.ClientSecretCredential implementation uses a client secret generated from an app registration to authenticate to blob storage. We pass in the Azure AD tenant ID, app client ID, and app secret we generated in the sections above. The RBAC settings of the service principal on the storage account handles authorization. Other TokenCredential implementations can be used to handle other authentication scenarios. For example, the Azure.Identity.DefaultAzureCredential will try a number of different credential types. The Azure.Identity.InteractiveBrowserCredential will open a web browser and prompt for a user login to authenticate the BlobServiceClient. More information about the TokenCredential class and it's implementations is available in this Microsoft doc.
Create Container, Upload File, Download File
The application supports 3 functions, create blob container, upload a file, and download a file. First, I'll go over creating the container. This takes a blob container name provided by the user and calls theCreateBlobContainerAsync method to create the container. If the app registration, RBAC, and config settings are setup correctly, the container will be created and available when browsing containers in the azure portal. The most common error I saw was permissions related because I didn't have the RBAC defined correctly. If this is the case, you will receive an AuthorizationFailure error. The other common error is mixing up the config values in ConfigConstants.cs.
Console.WriteLine("Create blob container");
Console.Write("Enter blob container name: ");
string containerName = Console.ReadLine();

try
{
    // Create the container and return a container client object
    BlobContainerClient containerClient = await blobServiceClient.CreateBlobContainerAsync(containerName.ToLower());
}
catch (Exception ex)
{
    Console.WriteLine(ex.Message);
}
Console.WriteLine("Upload a file to blob storage");
Console.Write("Enter full local file path: ");
string localFilePath = Console.ReadLine();
Console.Write("Enter blob container name: ");
string containerName = Console.ReadLine();

try
{
    BlobContainerClient containerClient = blobServiceClient.GetBlobContainerClient(containerName.ToLower());
    // Get a reference to a blob
    string fileName = Path.GetFileName(localFilePath);
    BlobClient blobClient = containerClient.GetBlobClient(fileName);

    Console.WriteLine("Uploading to Blob storage as blob:\n\t {0}\n", blobClient.Uri);

    // Upload data from the local file
    await blobClient.UploadAsync(localFilePath, true);
    Console.WriteLine("Upload Complete");
}
catch (Exception ex)
{
    Console.WriteLine(ex.Message);
}
DownloadToAsync to download the blob.
Console.WriteLine("Download Blob");
Console.Write("Container name: ");
string containerName = Console.ReadLine();

Console.Write("Blob name: ");
string blobName = Console.ReadLine();

Console.Write("Full Destination Path: ");
string destinationPath = Console.ReadLine();
string localFilePath = destinationPath + "\\" + blobName;

try
{
    BlobContainerClient containerClient = blobServiceClient.GetBlobContainerClient(containerName.ToLower());
    BlobClient blobClient = containerClient.GetBlobClient(blobName);

    Console.WriteLine("\nDownloading blob to\n\t{0}\n", localFilePath);

    // Download the blob's contents and save it to a file
    await blobClient.DownloadToAsync(localFilePath);
    Console.WriteLine("Download Complete");
}
catch (Exception ex)
{
    Console.WriteLine(ex.Message);
}
Conclusion
In this post I explained how to setup an Azure AD app registration and use RBAC to secure blobs and containers in a storage account. Then I explained parts of theAzure.Identity and Azure.Storage APIs for authenticating and manipulating blob containers and data using C#. Here are some additional resources from Microsoft on using the Blob Storage and Identity client libraries in C#: Quickstart: Azure Blob Storage client library v12 for .NET, Authorize access to blob data with managed identities for Azure resources, Choose how to authorize access to blob data in the Azure portal. Finally, head over to the 2021 C# Advent Calendar to see all the great posts this year!
